How to make a Lottie animation as a background in Webflow (Simple Tutorial)
In this article you'll learn how to set a Lottie animation as a background in Webflow using just two elements and a few simple steps.
.png)
In this article you'll learn how to set a Lottie animation as a background in Webflow. In fact it's so easy you'll be able to do it in just a few steps.
We'll dive into the specifics here soon, but for now here's a quick overview. To set a Lottie animation as a background, simply set the position of the animation's parent element to relative and then set the position of the Lottie animation to absolute with a width and height of 100%.
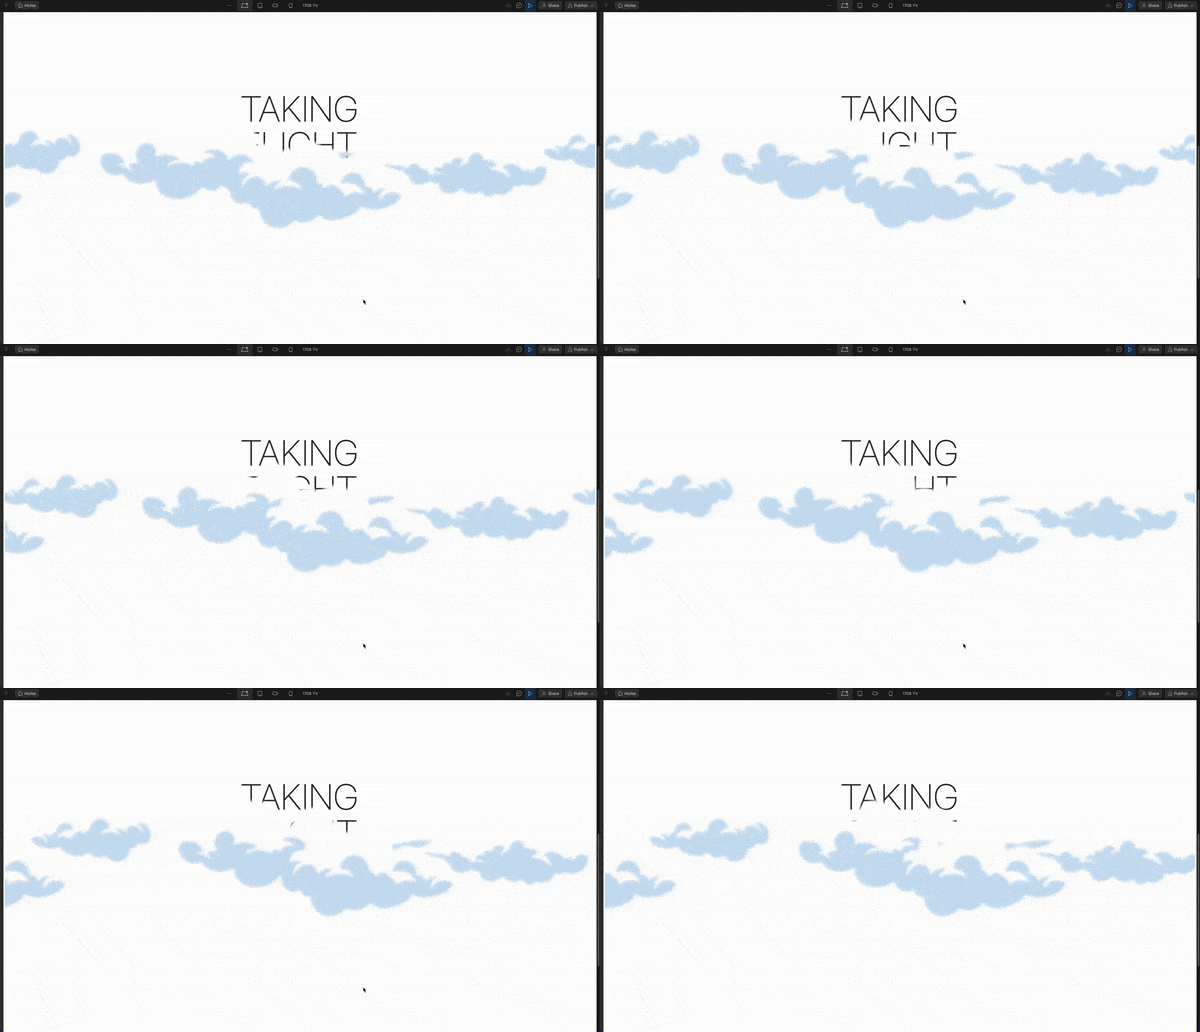
Example of a Lottie animation as a background
So first let's start with an example of using a Lottie animation as a background to show you what we'll be doing. Keep in mind this is just an example, you'll be able to set any Lottie animation you have as a background using the same method you'll learn in this article.

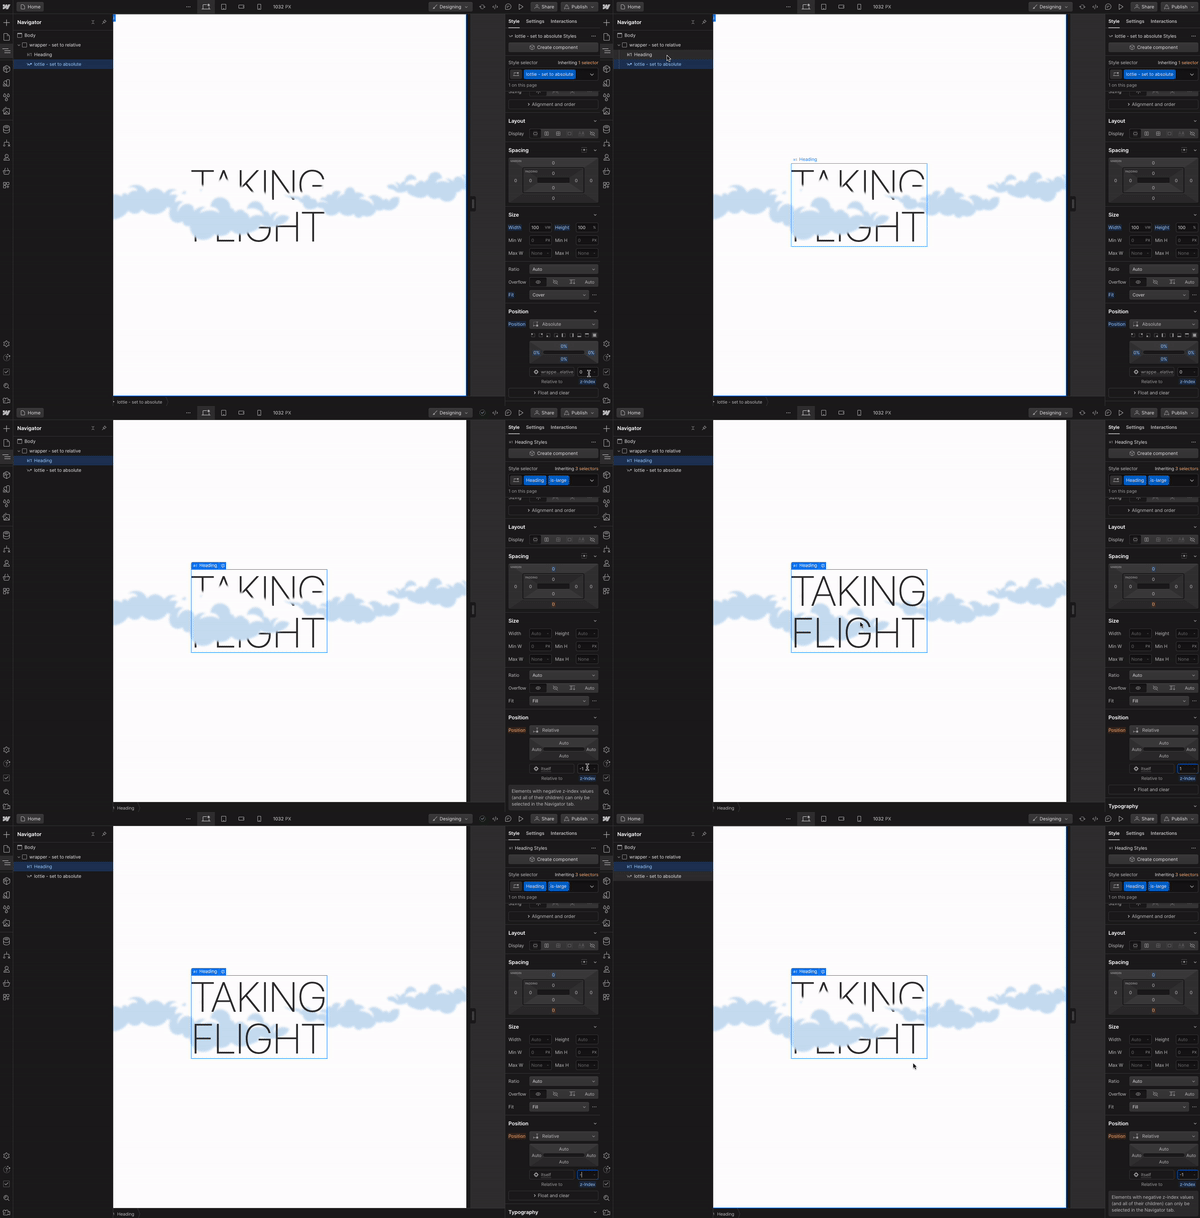
In the above example, you'll notice the Lottie animation is actually in the foreground, slightly layered over the text. This creates a nice layer effect that is very easy to do, although it's 100% optional.
Step 1: Adding a wrapper (parent element to the Lottie animation)
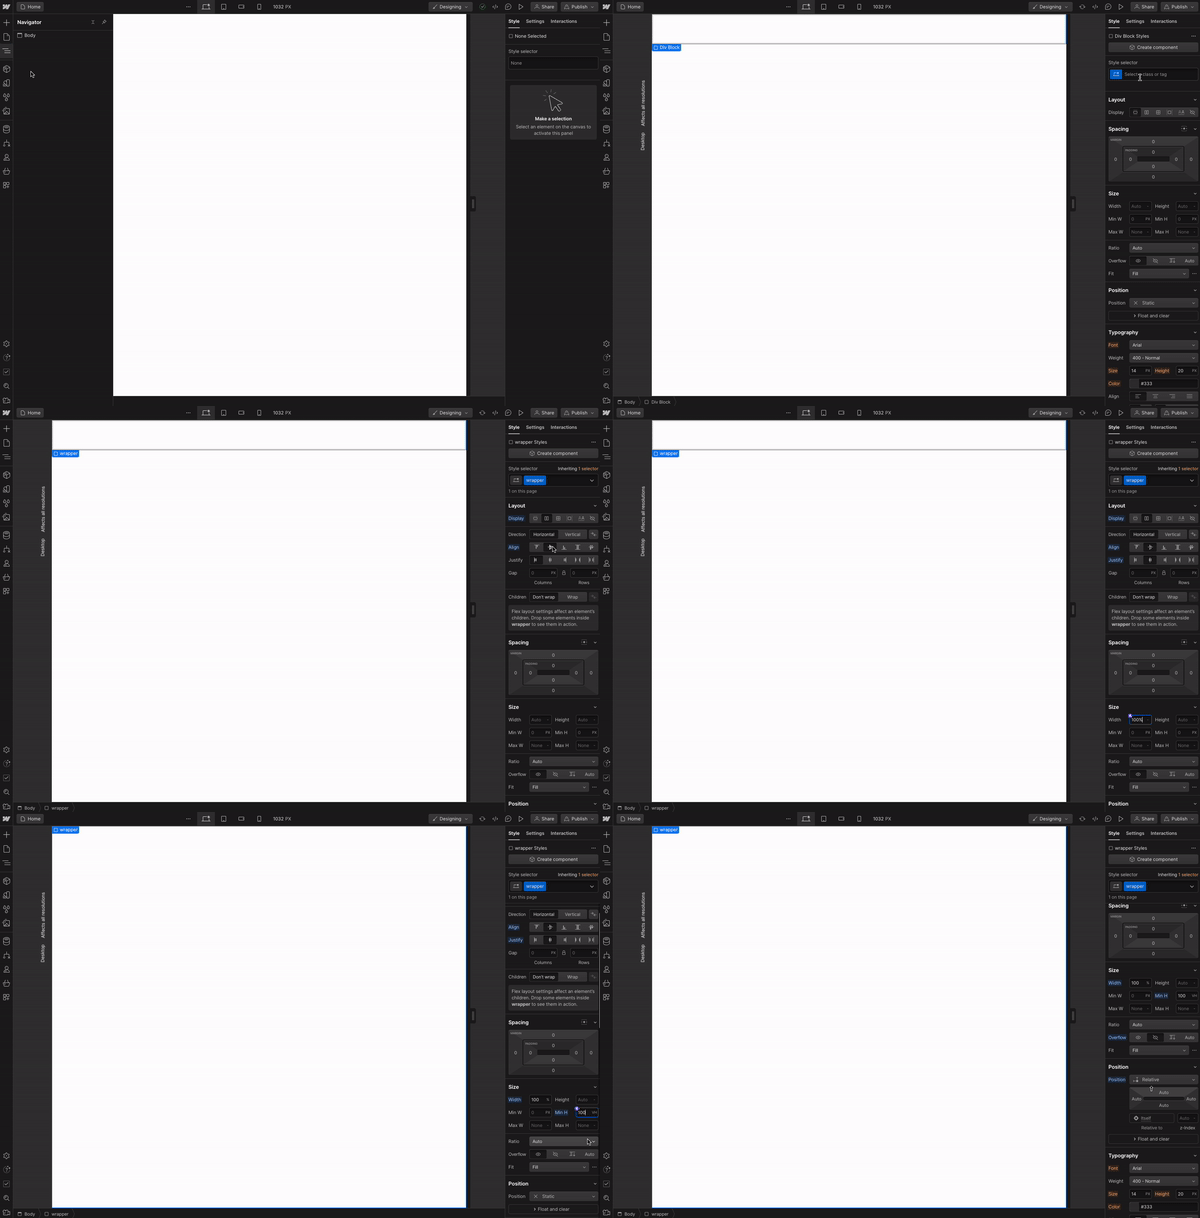
So to start, we'll need to add a wrapper div to the canvas. The purpose of this div is to be the parent element that we'll drop the Lottie animation into. If you're unfamiliar with relative and absolute positioning in Webflow, and CSS in general, and you don't understand what's going on here, you can refer to this helpful article on Webflow University.

In the Add panel under Basic you'll find an element called a div block. Drop this into the canvas and then add the following 6 styles:
- Add a div and give it a name like "wrapper".
- Under Layout, set display to flex.
- While still under Layout, set flex to align center and justify center.
- Under Size, set width to 100% and min height to 100VH (you can customize the height for your specific section).
- While still under Size, set overflow to hidden.
- Under Position, set position to relative.
Awesome! That's it for the wrapper, now on to the Lottie animation.
Step 2: Add + style the Lottie animation

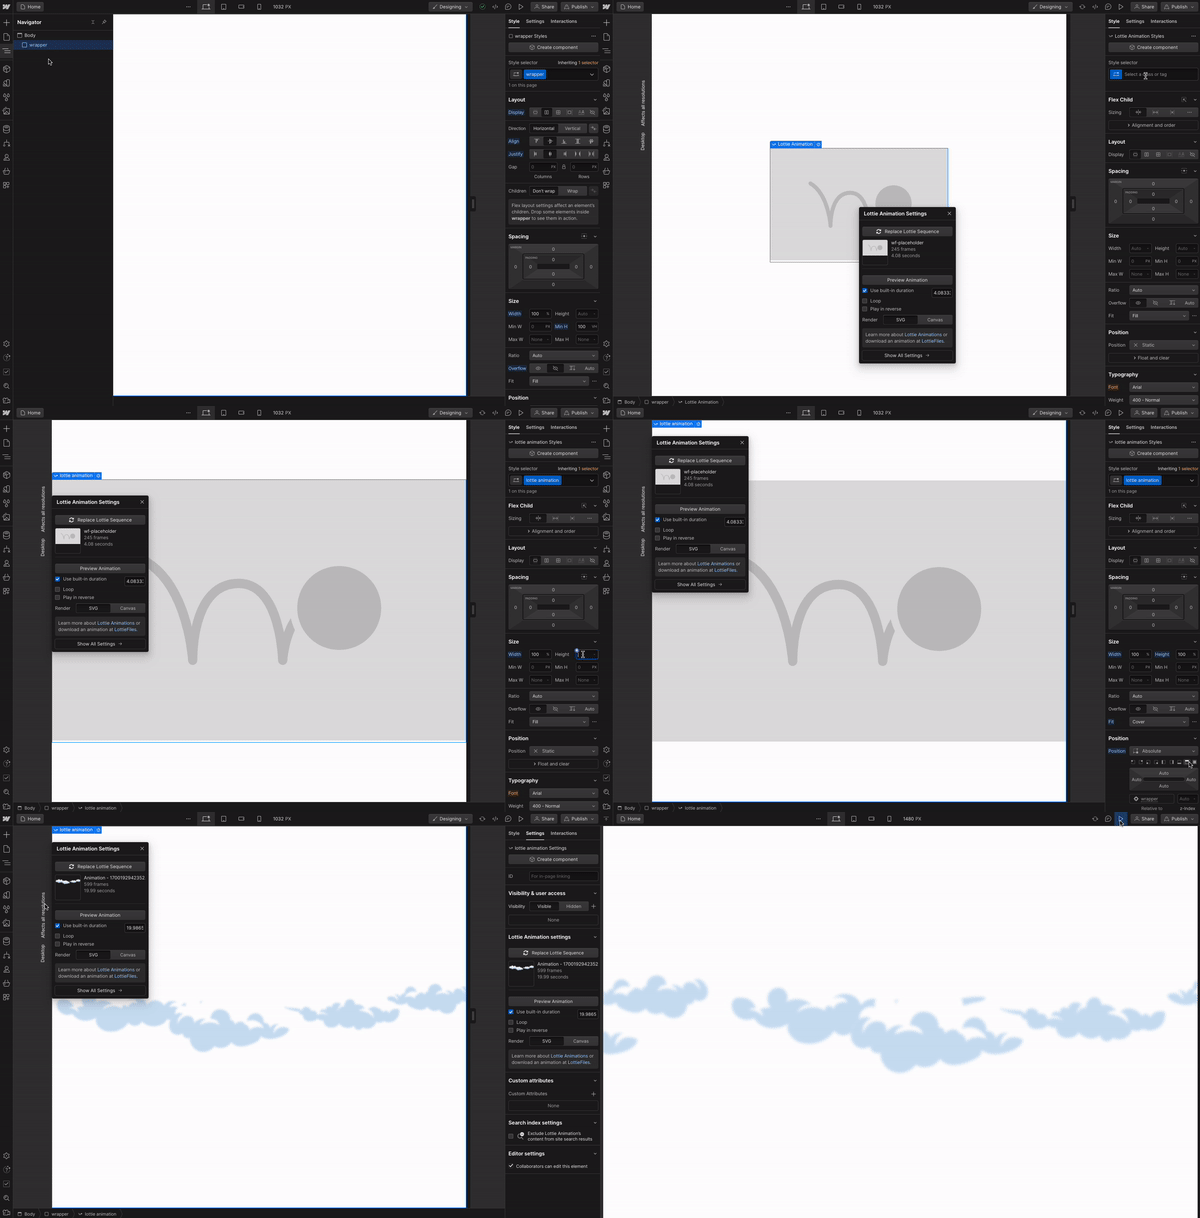
Go back to the Add panel and under Media, drag the Lottie animation into the div block from the last step and then add the following 5 styles:
- Under Size, set width to 100% and height to 100%.
- While still under Size, set fit to cover.
- Under Position, set position to absolute and then set to Full.
- Under the Settings tab, click on Replace Lottie Sequence and choose your desired Lottie animation from the asset bin.
- Set Lottie animation to loop.
That's it! You now have a Lottie animation as a background. You can use this for any section and for any Lottie animation.
Things to keep in mind
Setting a Lottie animation as a background is super simple. However there are a few things to keep in mind.
Resizing the height of the wrapper
By setting the Lottie animation to cover, it will automatically be responsive if you resize the wrapper. So while we set the wrapper to a height of 100VH in this tutorial, you can actually set it to whatever height you need.
You don't need a wrapper if you already have a section
If you're adding a Lottie animation as a background to an existing section, you can actually use your Section element as the wrapper instead. The goal of the wrapper is to have a parent element to the Lottie animation that is set to relative, so this can actually be any type of parent element including sections, containers, divs, etc.
How to use z-index to layer elements
If you want to layer elements like in the example earlier, this is where z-index comes in. Basically, an element with a higher z-index will be positioned over top an element with a lower z-index. Refer to the GIF below or check out this helpful article by Webflow on z-index.

Still need help?
If you're still struggling, either with this tutorial or with something else in Webflow, we'd love to hop on a 1-on-1 consulting call with you! For up to an entire hour, we'll answer any Webflow related questions you have and/or help you fix issues you're getting frustrated with live on the call. You can schedule a call for a time that works for you here: https://www.fitrmedia.com/services/webflow-consulting
.png)
Schedule a 1-on-1 Webflow consulting call with a vetted expert.


